


I never tell JD what my Spring Break project is going to be. I like the challenge of getting it finished before they return. And I love seeing their surprised faces when they discover what I conjured up. Bless his heart, JD handles it quite well, considering he never knows if he'll come home to a house that's still standing or not.
One year I built the picket fence bench that sits on our front porch. The next year I built the front porch railing. Another year I built the arbor. And this particular year, 2006, I tackled the bathroom walls and ceiling.
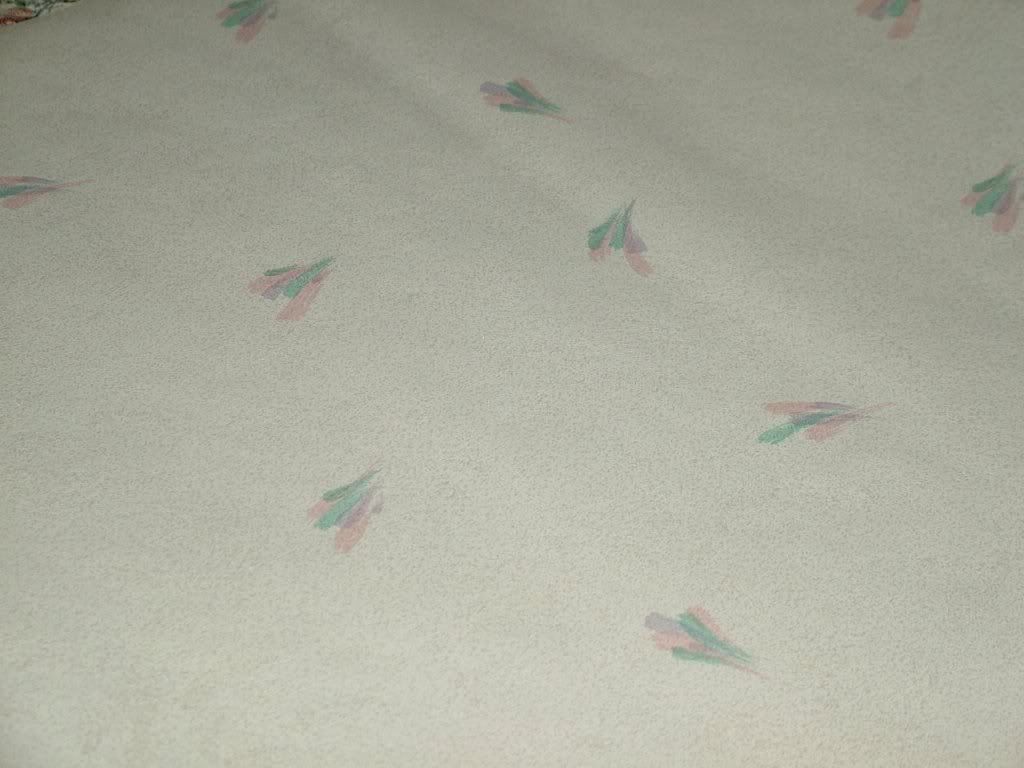
When we bought our home, there was wallpaper in the bathroom. I actually liked the pastel colors in the paper. But the brush stroke design was a bit too abstract for my liking. Besides, it was coming up along some of the seams (which I've found happens a lot in bathrooms)
I set to removing it. Initially, this went quite well. Until I got down to the nitty gritty. And found the previous owners had caulked the edges in place along the tile edge. Caulked both on top of and underneath the wallpaper.
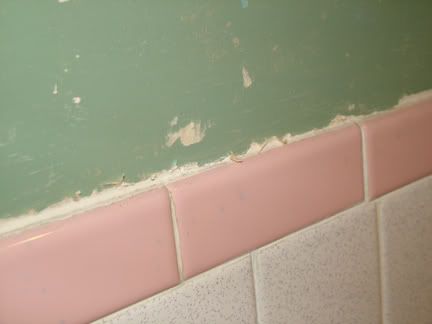
I should not have been surprised. After all, we'd already found many things in the house that they'd caulked for all eternity before. Like outlets.
I spent entirely too much precious time ridding the poor walls of the gooey mess. Then finally was ready to start adding my own touches to the room.
I wanted to paint stripes on the walls. Pink, green and a creamy off-white. As I recall, the green stripes were to be 8 inches wide. The white was 3 inches wide and the pink was 1 inch wide. Or something like that. I primed and painted the walls the off-white. Then I went around with my handy dandy ruler and marked off the stripes for the pink and green.
I worked my way around the whole bathroom, penciling in the stripes. To my utter amazement, when I got to the end, the measurements worked out exactly right. Lady Luck was smiling down on me.

I taped off the lines on one wall. I painted the green stripes.
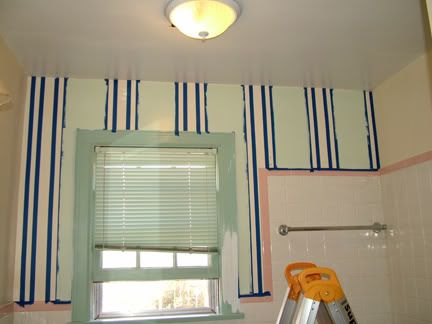
I painted the pink stripes.
I removed the tape. And that's when I realized.
Lady Luck wasn't just smiling on me. She was laughing at me. Hysterically.
 When I pulled off the tape, the paint came with it.
In sheets.
This was not a good day in Kim's World.
I was running out of time. I only had a few days left of Spring Break and I hadn't even started on the ceiling yet. There was no time to start over.
I gave up and painted it all a minty green.
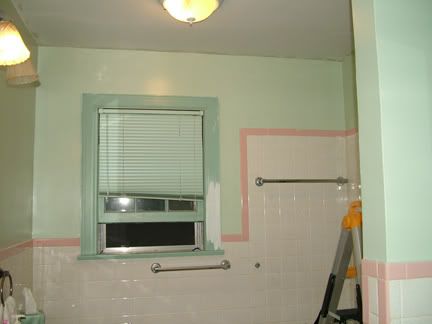
(In hindsight, Lady Luck was right. This look is better)
Next I started on the ceiling.
In case you haven't noticed, I'm a big fan of bead board. We did Blondie's room and bathroom walls with bead board paneling. I decided then that I don't like that stuff. I like the real thing. Her bathroom ceiling was done with the real thing. And I wanted to do the same here.
Our 1941 home has no drywall. It's all plaster. Nailing or screwing anything to plaster is a feat in itself. But when you're working on a ceiling, with gravity working against you, it's next to impossible.
Therefore, there are no nails or screws in the following photos.
Introducing my little friend....

And up went the new ceiling. One board at a time.
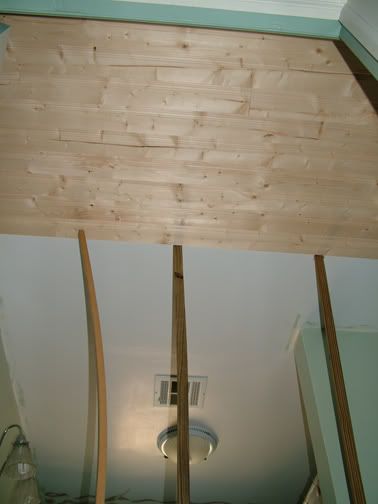
This took several days to complete. Because I had to wait for the glue behind each board to dry before I could add the next one.
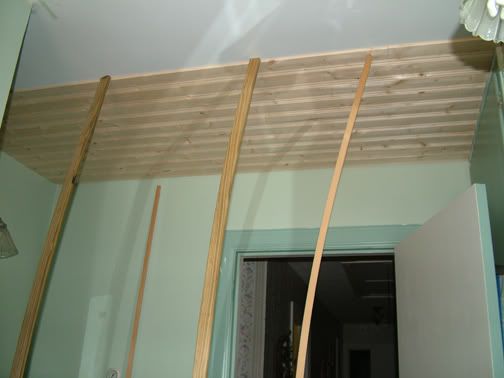
I had to brace each board while it dried too. Mind you, this is the only bathroom on the main floor of our home. And I was running a daycare during this time. The kiddos were so good about snaking their way through the maze of braces each time they used the bathroom.
Here is all the bead board up and primed.

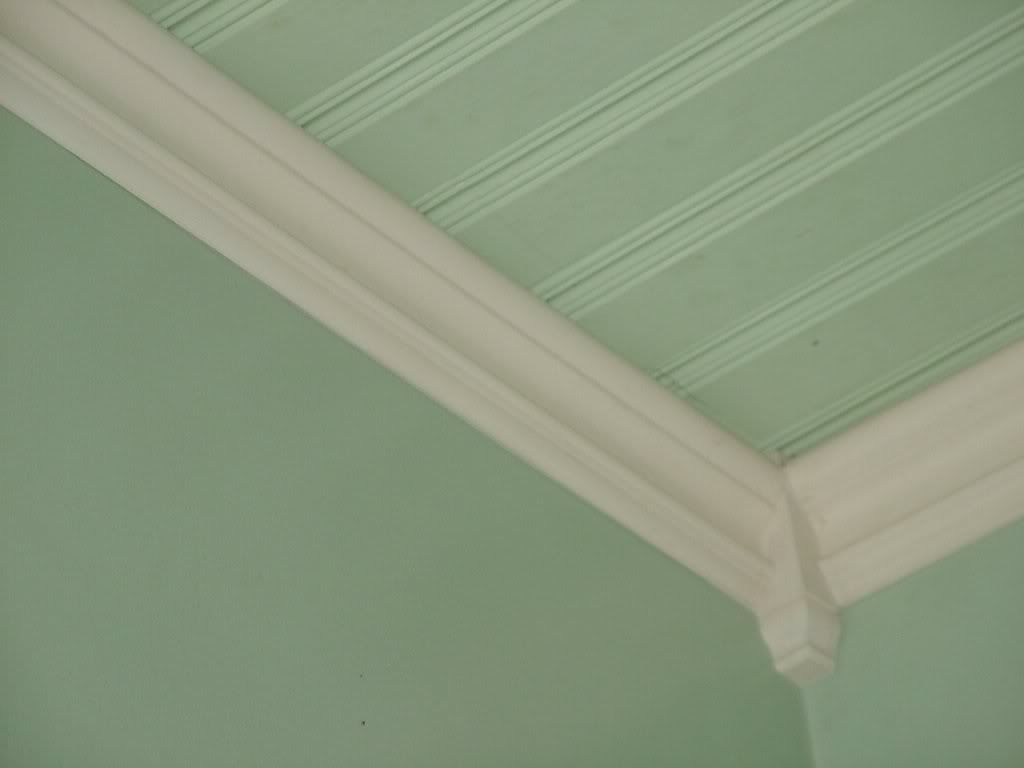
And here it is painted. (Believe it or not, the ceiling is a shade lighter than the walls. Lesson learned: Always go two shades lighter.)

Eventually, I got around to adding crown molding. Except that it's not really crown molding. That doggone budget thing wouldn't allow me to use anything but a very plain Jane crown molding. So I opted to use casing instead. Has a lot more moves n' grooves to it, but without the fancy schmancy price of real crown.
I've been sharing with you some pretty old pictures all week. Come back tomorrow for Pink Saturday and get a glimpse of what this room looks like nowadays. :-)


2 comments:
Happy Pink Saturday!
Lovely PINK delicate details!
~ Gabriela ~
Oh, I love the corner thingies! This look BETTER than crown - nicely done!
Colleen
Post a Comment